◀Back
Build and Run Native Executables with Remote JMX
Remote management using Java Management Extensions (JMX) is possible in native applications built with GraalVM Native Image.
Note: The feature is experimental.
This guide covers the steps required to build, run, and interact with a native executable using JMX. It also shows you how to register a custom managed bean (MBean) with the JMX server and the additional steps required for it to work with Native Image.
Currently Supported Features and Limitations
A JMX connection from a client to a remote MBean server is supported. The client, the server, or both may be a native executable. Only MXBeans, and standard user-defined MBeans, are supported. Dynamic and model MBeans are not supported because their management interfaces are defined at run time. Although remote management of MXBeans is supported, not all platform MXBean functionality is implemented or is applicable in a native executable. Additionally, to define and use standard MBeans, you must specify metadata configuration. This is further explained in this guide.
Run a Demo
Prerequisite
Make sure you have installed a GraalVM JDK. The easiest way to get started is with SDKMAN!. For other installation options, visit the Downloads section.
- Create and navigate to a directory named jmx-test. Save the following code to a file named SimpleJmx.java. The application
main()method registers a custom MBean, then loops endlessly, so you have time to inspect the process using VisualVM.import javax.management.MBeanServer; import javax.management.ObjectName; import java.lang.management.ManagementFactory; public class SimpleJmx { public static void main(String args[]) throws Exception { ObjectName objectName = new ObjectName("com.jmx.test.basic:name=simple"); Simple simple = new Simple(); simple.setName("someName"); MBeanServer server = ManagementFactory.getPlatformMBeanServer(); server.registerMBean(simple, objectName); while (true) { Thread.sleep(1000); System.out.println("JMX server running..."); } } public static interface SimpleMBean { String getName(); void setName(String name); String print(); } static class Simple implements SimpleMBean { private String name; @Override public String getName() { return name; } @Override public void setName(String name) { this.name = name; } @Override public String print() { return "Print output " + name; } } } - Compile the application using the GraalVM JDK:
javac SimpleJmx.javaThis creates SimpleJmx.class, SimpleJmx$Simple.class, and SimpleJmx$SimpleMBean.class files.
- Add dynamic proxy configuration. JMX uses dynamic proxies, a dynamic feature of Java, to access MBeans. To be able to interact with the custom
SimpleMBeanat run time, you need to provide Native Image with additional dynamic-proxy metadata for the MBean interface. For this, create the META-INF/native-image directory in the current working directory (jmx-test). In the META-INF/native-image directory create a reachability-metadata.json file with the following contents:{ "reflection": [ { "type": { "proxy": ["SimpleJmx$SimpleMBean"] } } ] } - Build a native executable with the VM inspection enabled:
native-image --enable-monitoring=jmxserver,jmxclient,jvmstat SimpleJmxThe
--enable-monitoring=jmxserveroption enables the JMX Server feature (to accept incoming connections). The--enable-monitoring=jmxclientoption enables the JMX Client feature (to make outgoing connections). Both features can be used together, comma-separated, for example,--enable-monitoring=jmxserver,jmxclient. Thejvmstatoption should also be included if you want to enable discovery by VisualVM and other JVMs:--enable-monitoring=jmxserver,jmxclient,jvmstat. - Run your native executable with JMX properties:
./simplejmx -Dcom.sun.management.jmxremote.authenticate=false -Dcom.sun.management.jmxremote.port=9996 -Dcom.sun.management.jmxremote.ssl=falseThis starts the application as a simple JMX server, without password authentication or SSL using port
9996. You can configure JMX to apply all the usual properties as shown in this guide, but this example uses a basic configuration for simplicity.
Now that the JMX server is running, inspect MBeans using VisualVM.
Inspect MBeans Using VisualVM
-
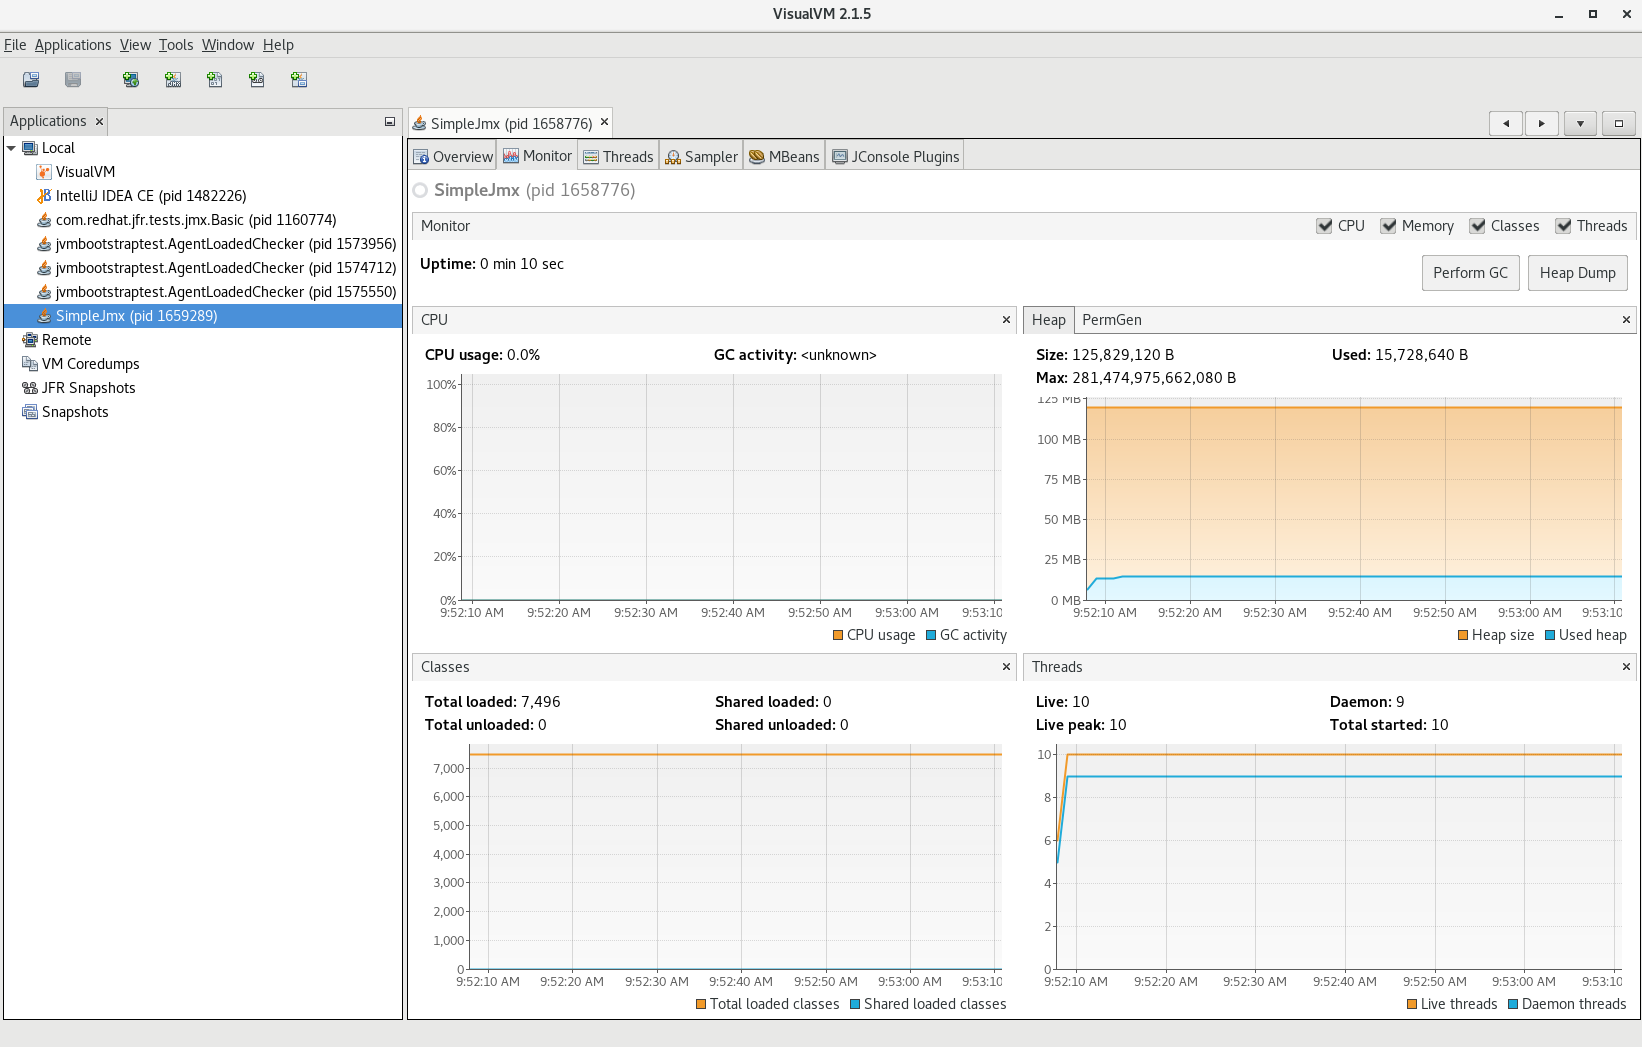
Start VisualVM to view the managed beans in a user-friendly way.
-
Make sure you have the VisualVM-MBeans plugin installed (go to Tools, then Plugins, under Available Plugins, select VisualVM-MBeans, and click Install).
-
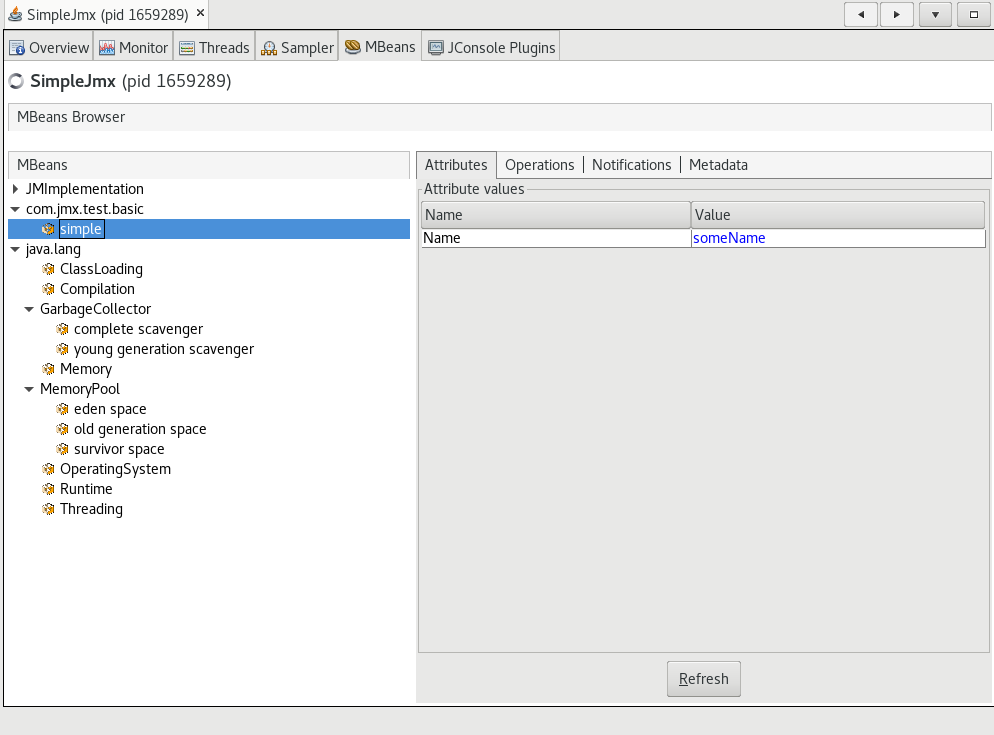
Go to the Applications tab and select the SimpleJmx process. From there you can select the MBeans tab.
-
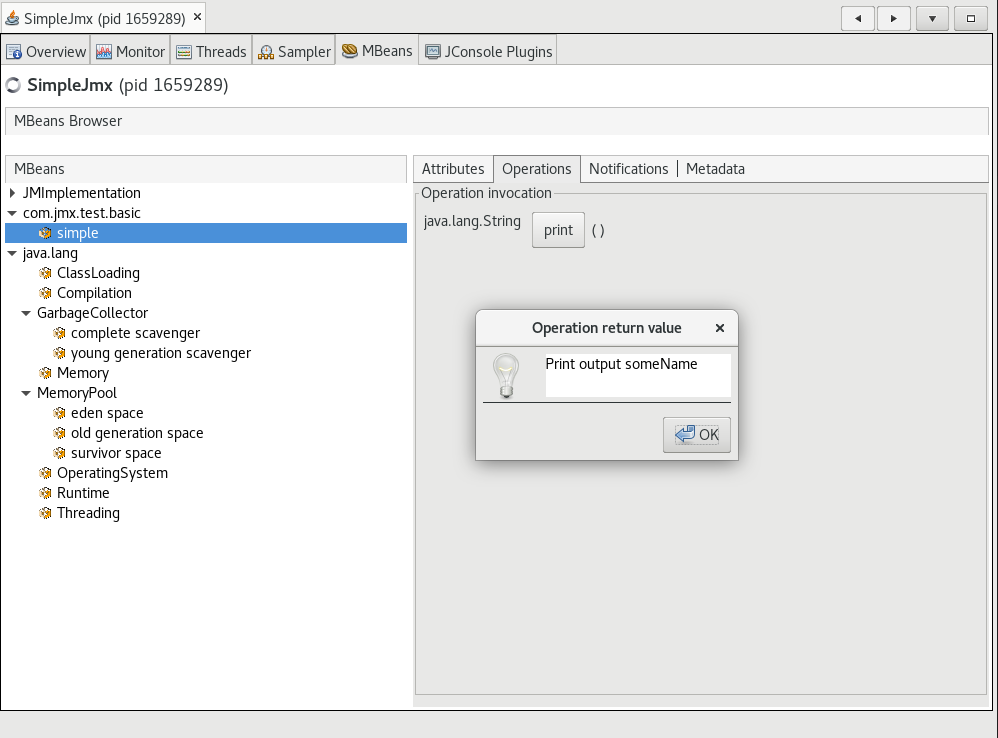
In the MBeans tab, you can inspect the custom MBean you created earlier and perform operations on it.
To conclude, Native Image provides support for remote management using JMX. Users can enable the JMX agent in a native executable to monitor a client application running on a remote system.